Category: Resin How To’s
Can you use acrylic paint to color resin? The answer is yes!
I don’t know where the idea came from but I had wondered if you could add acrylic paint to your resin creations? After all, I must have 100’s of colors sitting in my garage from previous craft projects. If this could be done it would really open up my color choices. You can buy acrylic paint in a whole spectrum and they are easy to mix so it was time to experiment, however, my last resin experiment was not successful.
+++++++++++++++++++++++++++++++++++++++++++++++++++++
About 4 years ago, I did try to add nail polish to the resin. It took almost 2 years for that mess to harden and to this day it’s still pretty flexible. Here’s a picture:

I can actually bend this bangle/cuff out of shape. So I pretty much gave up on trying to add weird things to the resin.
****************************************
Flash forward to today. I’ve been using artist pastels, Pearl X powder, glitter and Castin’ Craft resin dyes. All of these options work well, however, I thought it might be time to try something new. What if acrylic paint could be used?
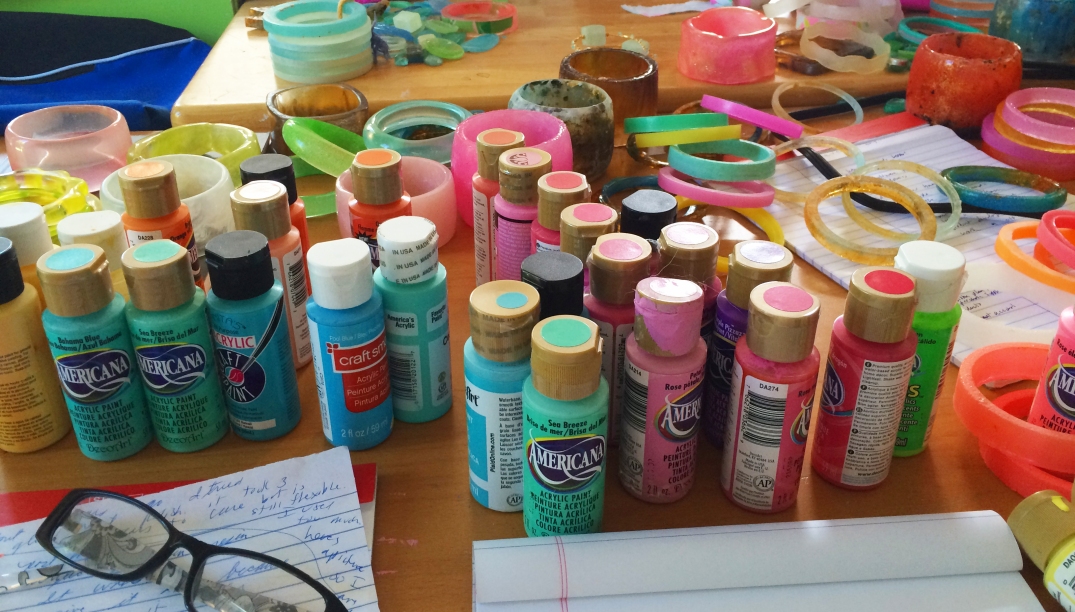
The craft acrylic paint that comes in small 2 oz plastic bottles had tons of color options and it’s cheap!
Here are some of the brands you can buy at Hobby Lobby, JoAnn’s, Michaels:
- Martha Stewart
- Anita’s
- Craftsmart
- Apple Barrel
- Americana
- Folk Art
- Ceramcoat
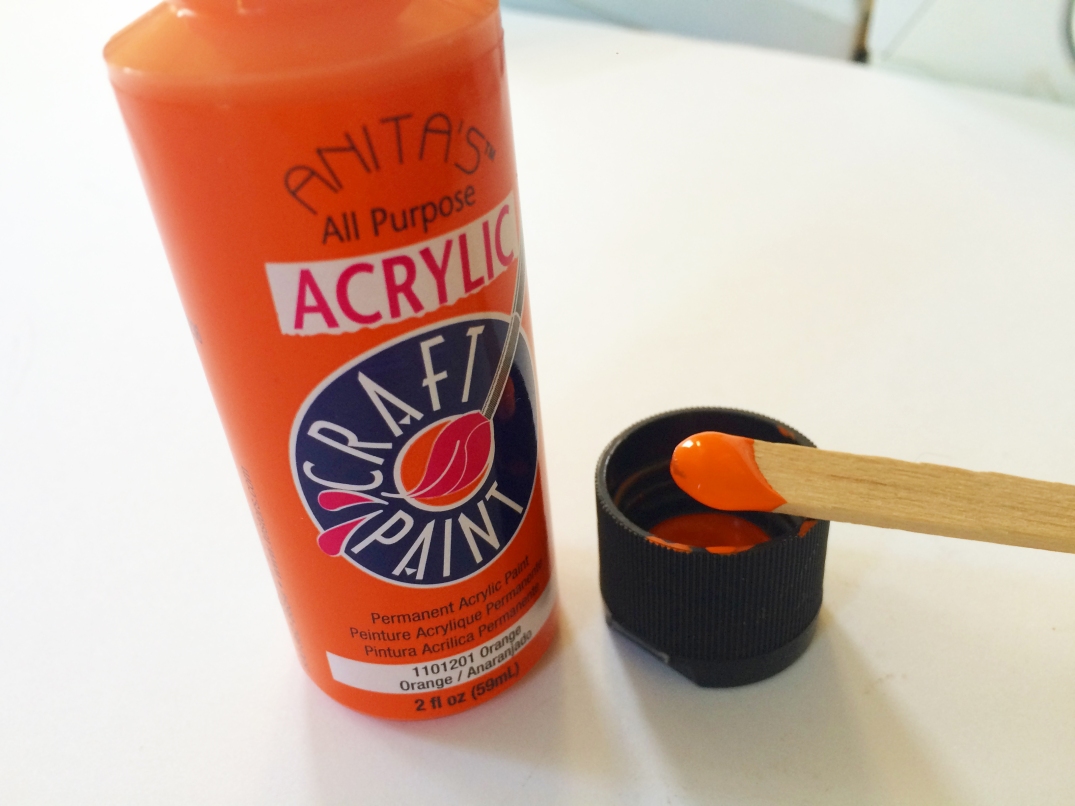
My very first try, I basically poured quite a bit of paint in to the resin. I didn’t really measure I just poured a big glop in to my cup. Big mistake. The result was very grainy, ugly particles. Not ideal at all. It took a week to cure. Here’s a picture below. See the rough edges and speckles?
So I decided not to give up and use less paint. I used about this much:
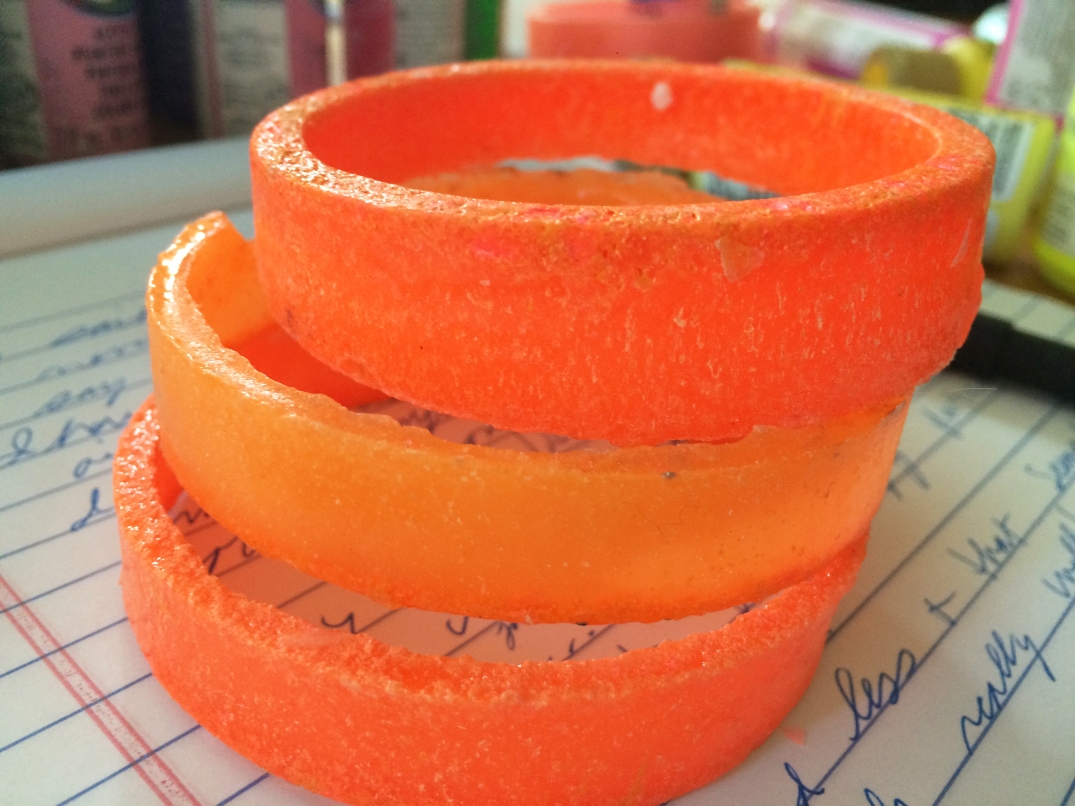
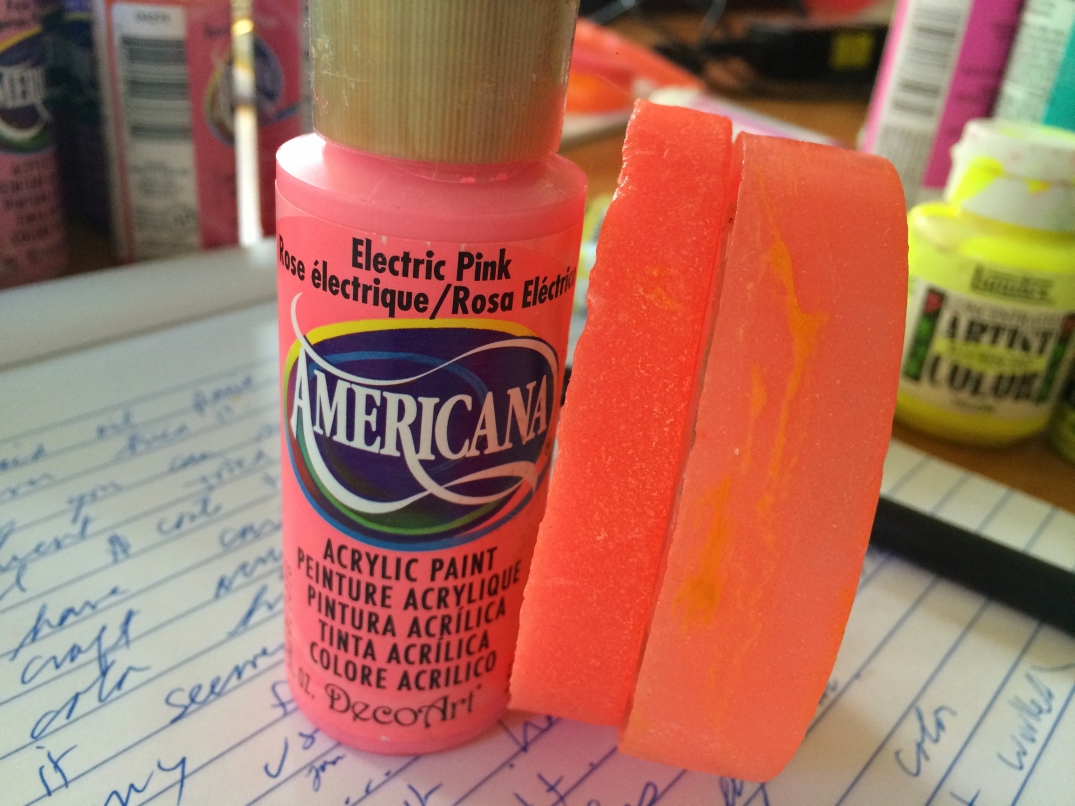
It actually worked! It did take a bit longer to cure. Maybe a day 1/2 instead of the usual 4 to 8 hours. I tried to add a bit more paint and it still worked. The amount you add will produce variations in the color. Please see below. The two bangles are made from the Americana Electric Pink. The bangle on the left has a bit more color. There is some graininess but it looks OK. I’ll know more once I try to sand it.
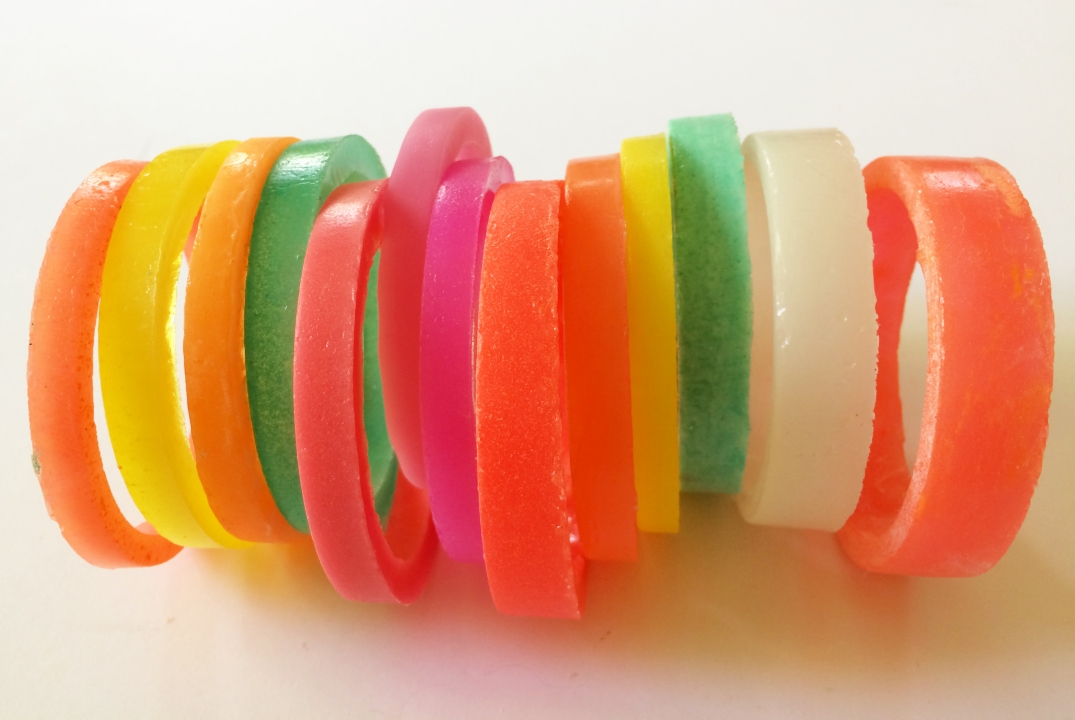
Yay! So this actually worked. I’m so pleased. It means that the possibilities for color are endless. Here are some examples of unfinished resin bangles that have been colored with the craft acrylic paint.

You can use acrylic paint to color resin bangles by Kim Taitano

Resin bangles colored with acrylic paint by Kim Taitano

Resin Bangles colored with peach acrylic paint by Kim Taitano

Resin bangles colored with acrylic paint by Kim Taitano

Resin bangles colored with acrylic paint by Kim Taitano
Here is another picture. It compares the paint color with the actual results. I would say that the cured resin color is very close to the actual paint color:

I hope you give this a try. Be sure to send some pictures of your new creations!
Thanks for reading!
How to make resin bangles – or how I make ’em!
Hi everyone!
I’m doing this next post specifically for my new found friend on Etsy, Miss Sophie of Things That Go Pop. Please check out her site on Etsy!
https://www.etsy.com/shop/ThingsThatGoPOP

Right now it’s currently empty but I’m sure that she’s going to be bringing you some awesome products really very soon! So please check back often!
++++++++++++++++++++++++++++++++++++++++++++
I’m going to share how I create my bangles. I’m clearly not an expert. This is just the process that I found that works for me. If you are reading this and you are a resin artist with better techniques – please share! I would love to find out what works for you.
Some artists might view this as giving away your secrets but here’s the thing…We all learn from each other. I had to learn how to make bangles from others. I read a lot of books. This was the main book that helped me:

Thank you so much Sherri Haab for sharing all your wonderful knowledge and for creating books that inspire us! I’m deeply grateful.
This book was extremely helpful too. The author is Carles Codina.

This book is packed with lots of great mold making tips. I learned so much form this book!
I’m also grateful to Cindy of Resin Obsession with all of her awesome resin videos. Please check them out on YouTube! She most unselfishly shares her knowledge! Love it! Plus she’s got tons of videos on all sorts of resin topics.

+++++++++++++++++++++++++++++++++++++++++++++++++++++++++++++++++
Before you start make sure you have protective gear. Resin making can be very dangerous. I wear rubber gloves when pouring resin. I wear a face mask and full welders face mask/eye goggles when sanding and buffing. You never know when something might go wrong and your buffer flies at your face. It can happen. Read my post on Dangerous Art.
OK so let’s begin. Here is the brand of resin that I use. It’s Castin’ Craft in the blue square can plus you have to buy the catalyst too. I usually buy at least 2 – 3 bottles of catalyst to one quart of resin. These can be purchased from dickblick.com:


If you have a Dick Blick store near you – sign up for the rewards program and they will send you fabulous 40% off coupons. It’s a great way to buy the really huge can for almost 1/2 off the original price. I think this resin brand is pretty economical. I think I can pour about 13 small bangles from the quart size which makes the cost of each bangle roughly maybe $1 maybe $2 at the most. I know some people might be thinking…oh and then you go and charge $40 bucks a bangle? Ha! Rip Off! But not really. Each bangle is so labor intensive. I’ve had to devote at least 3 – 6 hours on each bangle with the sanding process. There are some bad things to using this resin. It smells awful at first. I pour all my resin items in the garage. The smell can be too powerful. It does die down after 8 hours at least. This resin also breaks easily and is not scratch proof. I wish I could find a resin that is more durable but honestly…I have only tried a few brands. (like I said, I’m not an expert) I’ve stuck with Castin’ Craft because I can find it easily at the local Dick Blick store near my house or Michaels or Hobby Lobby and my results have been nice.
On most of my bangles – I add at least 20 drops of the catalyst to the resin and mix in plastic containers with popsicle sticks. More catalyst helps to take care of the stickiness after you pop the bangle out of the mold. But I think I might be getting ahead of myself. I should probably start with the steps I use to make the bangles:
************************************************************
1. Mix the resin and catalyst together in a plastic disposable container. I mix it with a popsicle stick. You probably have about 10 minutes of working time.
************************************************************
2. This is your chance to add your color or glitter. I use artist pastels for color (crush up into a powder) and have collected all sorts of colors and glitter. Please take a look at my messy collection! = – ) I think I might own just about every color of glitter known to man!


If you would like a pearl finish to your bangle you can use a pinch of Pearl Ex powder. Just add to your resin as you are mixing. You can find this powder in brown, gold, silver, white – you name it! It’s really cool stuff. Plus there are so many things that you can imbed inside the resin like confetti, beads, natural objects. I guess the possibilities are endless.


************************************************************************************
3. Spray your molds with a good mold release. I use this one which can be purchased from Polytek.com (which is the supplier I also use for my mold making materials – but more later on that)
http://www.polytek.com/index.php?dispatch=categories.view&category_id=300

It’s a little oily but works great!
************************************************************
4. Pour the resin in your molds. For right now, we will use some store bought molds. Please see below. I really like using these. The only problem is that most customers prefer bangles that measure 2 1/2 inches across in diameter. These are a bit bigger but they are super fun. There are some cool techniques I’ll show you in just a bit later such as doing stripes from these molds.

******************************************************************
5. I usually pour the bangles at night. In the morning I pop them out. Make sure you wear rubber gloves because they are still a bit sticky. I let them sit for at least 2 weeks before I even try to start sanding them. By that time all the stickiness is gone. Take a look at my stack of bangles that are ready for finishing.


I must have hundreds of them waiting to go. I do have my work cut out for me!
****************************************************************************************
6. Step in the time machine. Fast forward to at least 2 weeks later or when ever the resin has fully hardened and we are ready to start sanding. I do prefer 2 types of sandpaper: 1. Ace Hardware 2. 3M (I only prefer 800 grit 3M because it works wonders)


Put on a long movie and get ready because here is my sanding technique. We are going to work in this order:
 The only picture not listed is the Ace Hardware 150 grit – that’s because I’m out. Gotta buy more!
Order of sanding:
A. Ace Hardware 150 grit (not waterproof) sandpaper
B. Ace Hardware 180 grit waterproof sandpaper
C. Ace Hardware 220 grit waterproof sandpaper
D. Ace Hardware 320 grit waterproof sandpaper
E. Ace Hardware 400 grit waterproof sandpaper
F. Ace Hardware 600 grit waterproof sandpaper
G. 3M 800 grit waterproof sandpaper – like I said 3M 800 is fantastic. I wish I could find all the grits by 3M. I can’t find them.
H. Ace Hardware 1500 grit sandpaper
+++++++++++++++++++++++++++++++++++++++++++++++
A. I start with Ace Hardware grit 150. Grit 100 is just too rough and makes big scratches that are hard to fix. I start with Ace Hardware 150 that is not for waterproof sanding. I can’t find waterproof sandpaper in 150 grit. If you know of a brand – let me know. I sand the bangle dry with out the use of water. This way I can see what parts I need to sand smoothly. I do a lot of sanding so sometimes I wear those old fashion rubber thimbles that secretaries use. Here’s a picture:

They are super dorky but they really have saved my fingertips from bleeding! Ouch! I sand the entire bangle so it looks rough like this and all the nicks are uniformly sanded down and even. Take your time. This is your chance to sand everything evenly. If you don’t take your time and sand all the imperfections away you will still see them as you get to the higher grit sandpapers and you will have to start all over. Ug!


B. Next we start with the waterproof sand paper grit 180 from Ace Hardware. These are sold individually at Ace.
I start sanding the bangle in a shallow dish of water (see my favorite pink polka dot dish) with the grit 180 sandpaper.


Please excuse my nasty nail polish. Resin bangle making is extremely harsh on the hands. When you are finished you will need a good manicure. = – )
The purpose of the water is to clear off the resin particles. Your bangle starts to look substantially better with water. You will get a much better idea of what the finished bangle is going to look like.
C. Then switch to each grit 220 then to 320 then to 400 all in water and occasionally rinse the bangle under clear water to remove the resin particles. When you reach 400 grit make sure you take your time. 400 grit really starts to smooth the bangle. You will see a huge change in texture. It’s lovely! 600 and then 800 grit makes all the difference. When you finally get to 1500 grit, you keep sanding until your bangle is starting to shine. I do recommend that you keep going until you see that shine. It will save time later when you start to buff your bangle. You know that you are almost done.
*******************************************************************
7. Congratulations on making it thru all the sanding. Whew! Did you manage to watch at least maybe 2 movies? Now it’s time for the buffing. First let’s talk about buffers. I bought mine at Contenti Jewelry making supply. A great site. Here is the link:
http://www.contenti.com/products/polishing/310-028.html
I have the Compact Polishing Lathe which is inexpensive and works great. Here’s a picture:

I’m on my second machine because I had an accident. Read my post on Dangerous Art. These can be very dangerous so make sure you wear proper protective gear such as a face mask and goggles.
I have 2 different types of buffs on my wheel. Here I’ll show you. The right side is my smaller buff made of chamois. I use this buff for the inside of the bangles. You need a smaller size buff so you can get inside the bangles. The left side shows the standard buff used for the outside of the bangles.


Here’s what I use to polish the bangles:

I buy this from Sally’s Beauty Supply. Yes this is used to buff your nails but it works well. I have tried other products but they never seemed to work for me so this is what I use. Funny huh? Who knew nail products could work so well!
I spread this all over the bangle and then buff it out. My buffer is variable speed. Don’t put the speed too high because you will burn the resin. Here’s the speed that I use. I never go past this or you will burn your work. I only have 2 numbers on my buffer. I have the lowest at 2000 and the highest at 7000. My guess is 5000?


I make sure that I also buff the inside of the bangle.


If you have done a good job in sanding – the buffing process does not take long at all. Maybe 15 minutes? Once I’m done buffing then I wipe turtle wax all over the bangle and let it dry. It dries in one minute. You can find this in the automotive section or automotive store.


Then hand buff with a chamois cloth (buy at the automotive dept or store) or you can buy Selvyt Polishing cloths from Contenti:
http://www.contenti.com/products/polishing/140-851.html


Which one is better? Sometimes the Selvyt cloth polishes better. It depends. But the turtle wax will really make your work shine. That’s basically it. You get to enjoy your beautiful piece of art to wear.

My next post – I’ll share some pictures of the stages of sanding and buffing and what your bangle looks like as it goes thru the stages.
Happy Bangle Making and Be Safe!
KIM
Road Blocks!
Last September 2012 I hit a road block. Actually a creative block. I couldn’t produce anything. It was the weirdest thing I’ve ever encountered and didn’t know what to do or how to help myself. I think I got scared because I was starting to get a negative reaction to my work – my resin bracelets. People were returning them and saying they were just too large. I was devastated. I was designing them with my own wrist and hand in mind which I found out is much bigger than the average woman. I needed to resize my work which was so hard to do. I had limited capital and needed to buy more polyurethane mold making material so I could create new designs.


I did eventually buy more mold making material. My plan is to buy a little bit each month and try to produce 6 new designs per month. My next obstacle is that I’m in love with bright colors. I realize not everyone likes bright. I am trying to come up with more subdued designs too. Here is an example:


I’m still going to make all my bright colors! I just can’t help it! I’m in love with pink, red and orange! I’ve started researching what are the hot colors for this year. 2013’s Pantone’s color of the year is Emerald! So be sure to be on the look out for Emerald bangles on my Etsy site!
